Marshmallow Fondant...
...because the Internet NEEDS another marshmallow fondant tutorial!
I use Rhonda's Ultimate Marshmallow Fondant. Found here. It's fabulous and I love it. It's been my favorite for about four years, give or take.
And the ingredients...

Now, the recipe starts out with 15 ounces of mini marshmallows. Every marshmallow I've ever bought comes in either a 10- or a 16-ounce bag. However, this recipe will not work right with 16 ounces of marshmallows. For real. So take out one ounce of marshmallows and do whatever it is that you do with one ounce of marshmallows.

Or I guess you could just buy three 10-ounce bags and make two batches, if you want to do it the easy way.
Grease a microwave-proof bowl and spoon. Pour the marshmallows into the bowl. Add two tablespoons of water. Set aside.

I like to mix the remaining ingredients together in a small bowl before I melt the marshmallows because you will want to add the other ingredients as soon as the marshmallows are melted.
So stir together salt, lemon juice, lemon extract, vanilla extract, and corn syrup. (Man, I go through a LOT of corn syrup. I wonder if that's normal?)

Now melt the marshmallows! Microwave on high for 2 minutes, stopping to stir every forty seconds or so.
After the first forty:

(I am not going to show you the inside of my microwave because you would totally judge me and probably never visit this blog again.)
After the second forty:

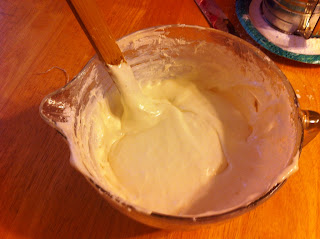
And the finished product:

Quickly add the other ingredients, being sure to scrape out the salt that has settled to the bottom of the bowl:

Stir well to combine. If you were going to make a batch of colored fondant, now would be the time to add the color. I am going to be making several colors out of this batch, so I left it white. But adding color now is much easier than adding it later.
Now stir in the sifted powdered sugar, one cup at a time. Here's the first cup:

Here's about three cups:
And finally, at about six cups, you will have to turn the fondant out onto a well-greased surface and knead in the remaining sugar. Grease your hands first.
I don't actually have any pictures of that part because my hands were covered with shortening and fondant. But after you're done, form the fondant into a ball and grease the outside of the ball.

Wrap the ball of fondant in two layers of plastic wrap, put that in a sealed Ziploc bag, and let rest on the counter overnight.

You can use it after a couple of hours if you need to, but it's a little loosey-goosey and kind of hard to work with.
This fondant is my absolute favorite. It tastes really good and it's easy to work with. Plus, it's inexpensive. I sometimes mix it with a little bit of Wilton ready-made fondant, which makes it that much easier to work with.
Well, that's all for now.
Enjoy!
I use Rhonda's Ultimate Marshmallow Fondant. Found here. It's fabulous and I love it. It's been my favorite for about four years, give or take.
And the ingredients...

Now, the recipe starts out with 15 ounces of mini marshmallows. Every marshmallow I've ever bought comes in either a 10- or a 16-ounce bag. However, this recipe will not work right with 16 ounces of marshmallows. For real. So take out one ounce of marshmallows and do whatever it is that you do with one ounce of marshmallows.

Or I guess you could just buy three 10-ounce bags and make two batches, if you want to do it the easy way.
Grease a microwave-proof bowl and spoon. Pour the marshmallows into the bowl. Add two tablespoons of water. Set aside.

I like to mix the remaining ingredients together in a small bowl before I melt the marshmallows because you will want to add the other ingredients as soon as the marshmallows are melted.
So stir together salt, lemon juice, lemon extract, vanilla extract, and corn syrup. (Man, I go through a LOT of corn syrup. I wonder if that's normal?)

Now melt the marshmallows! Microwave on high for 2 minutes, stopping to stir every forty seconds or so.
After the first forty:

(I am not going to show you the inside of my microwave because you would totally judge me and probably never visit this blog again.)
After the second forty:

And the finished product:

Quickly add the other ingredients, being sure to scrape out the salt that has settled to the bottom of the bowl:

Stir well to combine. If you were going to make a batch of colored fondant, now would be the time to add the color. I am going to be making several colors out of this batch, so I left it white. But adding color now is much easier than adding it later.
Now stir in the sifted powdered sugar, one cup at a time. Here's the first cup:

Here's about three cups:

And finally, at about six cups, you will have to turn the fondant out onto a well-greased surface and knead in the remaining sugar. Grease your hands first.
I don't actually have any pictures of that part because my hands were covered with shortening and fondant. But after you're done, form the fondant into a ball and grease the outside of the ball.

Wrap the ball of fondant in two layers of plastic wrap, put that in a sealed Ziploc bag, and let rest on the counter overnight.

You can use it after a couple of hours if you need to, but it's a little loosey-goosey and kind of hard to work with.
This fondant is my absolute favorite. It tastes really good and it's easy to work with. Plus, it's inexpensive. I sometimes mix it with a little bit of Wilton ready-made fondant, which makes it that much easier to work with.
Well, that's all for now.
Enjoy!


Comments
Post a Comment