Heavenly Honey Wheat Bread
Who wants to make bread?!?! I mean the good stuff...100% whole wheat with no refined sugars!?!?

Since we started this whole foods diet thingy, I have discovered that almost none of the bread in the bread aisle at the grocery store is really 100% whole wheat, despite what the labels claim. And the ones that are 100% whole wheat still contain preservatives and refined sugars.
So I moved it on over to the freezer case, where I found Ezekiel 4:9 bread. Made with 100% sprouted grains and NO sugars or preservatives of any kind. The only problem is that it's $5.00-ish a loaf. I really can't work much of that into my budget. But if you can, I totally recommend it.
Faced with overwhelming adversity, I did what any other slightly imbalanced mom would do. I decided to make the dang bread myself. I'm just a glutton for punishment, I guess.
Hang on to your knickers, here we go!
I always use King Arthur flour. It costs more, but it's worth it. I really don't get the same results with any other flour. (Disclaimer: I am not in any way being compensated for my opinion. I am a lowly blogger and King Arthur has never heard of me.) Whole wheat King Arthur is about $5.00 a bag in my neck of the woods, and I can get a fair number of loaves out of one bag.
And here are all of our ingredients. Not a whole lot of them, which is good.

First things first, mix one cup of hot tap water with one quarter cup of honey. Stir it up really good, sprinkle on the yeast, give it another stir and let it sit for 5 minutes or so.
In the meantime, mix together 5 cups of flour, 8 teaspoons of vital wheat gluten and some salt. Stir to combine.

The vital wheat gluten really helps whole grain breads achieve a lighter texture. I have made plenty of wheat bread without vital wheat gluten, and it's not a requirement, but I would definitely recommend it. There is a small box pictured above, but the next time I went to the store I found a one pound bag of Bob's Red Mill and got that. My grocery store is rather hit-or-miss. The first time I looked for vital wheat gluten, all they had were the small boxes. The next time, all they had were the large bags. Sheesh. Get the big bag and keep it in the fridge.
Now go get your yeast. It should look something like this:

And now a word on yeast: For a LONG time I thought I was a failure a making yeast breads. The yeast didn't really froth when I activated it...just a pitiful little cluster of bubbles on top of the water. The loaves I made wouldn't rise very high, no matter what I did. I was distraught. Well...maybe not distraught...but I was certainly discouraged. And then one day, when I was preparing to make cinnamon rolls, I realized I was out of yeast. I sent Hubby to the store for some more, and he brought back *gasp* name brand yeast! I had been using generic. Turns out, I'm not a complete failure. The generic yeast was crap. I've been using Fleischmann's ever since, and no more problems with rising dough. Now take that information and do with it what you will.

Make a well in the dry ingredients. Add the yeast mixture, one additional quarter cup of warm water and a quarter cup of olive oil to the flour. Put the bowl on your mixer if you're using one and add the dough hook. If you're not using a mixer, no problem.

Turn the mixer on the lowest speed and let it go for 6-8 minutes. If you're mixing by hand, mix the ingredients together and then knead the dough for 10 minutes or so. (I don't knead by hand anymore because I always add too much flour when I do, and my bread comes out a little dry.)

Mix for a little while and when the flour is incorporated decide if you need the final quarter cup of water. The dough should come together in a ball, and be just ever so slightly sticky. For this batch I added about an eighth of a cup more water.

And let it go until the time is up and it's nice and elastic-y looking. Wheat bread doesn't get as nice and stretchy as white bread, in my experience, so don't expect it to.
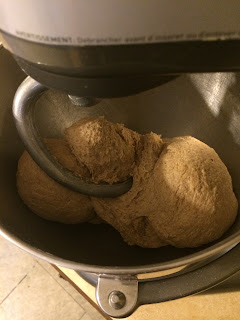
When the kneading is done, form the dough into a ball, grease the bowl, put the dough back into the bowl, cover with a tea towel and set it in a warm place to rise for about an hour.

During the spring/fall/winter, I preheat my oven to 200 degrees F, turn off the oven, then put the dough in the oven and leave the door cracked.

About an hour later, your dough should be nice and big.

Lovely.
Turn it out onto a lightly floured surface.

Roll the dough into a rectangular shape.

Use your handy-dandy bench scraper to cut the dough in half.

And roll the dough into two loaves, pinching the seam to seal and tucking under the edges. Please roll tightly, or you will get unsightly (and gigantic) air pockets in your loaves of bread.

Place your newly-formed loaves into two greased loaf pans, cover, and set them in a warm place to rise. This is when I preheat my oven to 350 F and then put the loaves on top of the stove, since my oven vents onto the stove top.

Another thing I do is put a small pan of water in the bottom of the oven to create steam. Makes for a crispier crust if you're into that kind of thing.
Half an hour later, your loaves should be well risen. Sorry for the yellow photo. I may have relapsed and stopped using my camera.

Bake at 350 for 45 minutes. When it's done the bread should sound hollow when thumped on the bottom.
As usual, one of my loaves is bigger than the other.

It looks like real, honest-to-goodness bread!

Now all you need to do is slice it up. Use a large serrated knife. It may take a little practice to get uniform slices.

Ain't it purty? My mom trained me to save bread bags, so I always have a supply on hand. Once the loaf is sliced, stand it vertically on one end and slide a bread bag down over it. Much easier than trying to wrestle an horizontal loaf into a bag. Trust me.
This is good for sandwiches, peanut butter toast, whatever. Keep it in the freezer if you don't plan to use it all in a day or two. I usually slice both loaves, freeze one and leave the other out for immediate use. It doesn't normally last much longer than a day. I think I made bread three times last week. I was not amused. But the family could be eating worse things, so I guess I really don't mind after all.
If you're feeling adventurous, substitute molasses for the honey and melted butter for the olive oil. Yum.
Heavenly Honey Wheat Bread
2 1/4 to 2 1/2 cups warm water (120 - 140 F)
1/4 cup honey (or molasses)
3 tsp active dry yeast
1/4 cup olive oil (or melted butter)
6 cups 100% whole wheat flour
8 tsp vital wheat gluten
1 tsp salt
Well, that's all for today. I have to go have some peanut butter toast now.
Enjoy!

Since we started this whole foods diet thingy, I have discovered that almost none of the bread in the bread aisle at the grocery store is really 100% whole wheat, despite what the labels claim. And the ones that are 100% whole wheat still contain preservatives and refined sugars.
So I moved it on over to the freezer case, where I found Ezekiel 4:9 bread. Made with 100% sprouted grains and NO sugars or preservatives of any kind. The only problem is that it's $5.00-ish a loaf. I really can't work much of that into my budget. But if you can, I totally recommend it.
Faced with overwhelming adversity, I did what any other slightly imbalanced mom would do. I decided to make the dang bread myself. I'm just a glutton for punishment, I guess.
Hang on to your knickers, here we go!
I always use King Arthur flour. It costs more, but it's worth it. I really don't get the same results with any other flour. (Disclaimer: I am not in any way being compensated for my opinion. I am a lowly blogger and King Arthur has never heard of me.) Whole wheat King Arthur is about $5.00 a bag in my neck of the woods, and I can get a fair number of loaves out of one bag.
And here are all of our ingredients. Not a whole lot of them, which is good.

First things first, mix one cup of hot tap water with one quarter cup of honey. Stir it up really good, sprinkle on the yeast, give it another stir and let it sit for 5 minutes or so.
In the meantime, mix together 5 cups of flour, 8 teaspoons of vital wheat gluten and some salt. Stir to combine.

The vital wheat gluten really helps whole grain breads achieve a lighter texture. I have made plenty of wheat bread without vital wheat gluten, and it's not a requirement, but I would definitely recommend it. There is a small box pictured above, but the next time I went to the store I found a one pound bag of Bob's Red Mill and got that. My grocery store is rather hit-or-miss. The first time I looked for vital wheat gluten, all they had were the small boxes. The next time, all they had were the large bags. Sheesh. Get the big bag and keep it in the fridge.
Now go get your yeast. It should look something like this:

And now a word on yeast: For a LONG time I thought I was a failure a making yeast breads. The yeast didn't really froth when I activated it...just a pitiful little cluster of bubbles on top of the water. The loaves I made wouldn't rise very high, no matter what I did. I was distraught. Well...maybe not distraught...but I was certainly discouraged. And then one day, when I was preparing to make cinnamon rolls, I realized I was out of yeast. I sent Hubby to the store for some more, and he brought back *gasp* name brand yeast! I had been using generic. Turns out, I'm not a complete failure. The generic yeast was crap. I've been using Fleischmann's ever since, and no more problems with rising dough. Now take that information and do with it what you will.

Make a well in the dry ingredients. Add the yeast mixture, one additional quarter cup of warm water and a quarter cup of olive oil to the flour. Put the bowl on your mixer if you're using one and add the dough hook. If you're not using a mixer, no problem.


Mix for a little while and when the flour is incorporated decide if you need the final quarter cup of water. The dough should come together in a ball, and be just ever so slightly sticky. For this batch I added about an eighth of a cup more water.


When the kneading is done, form the dough into a ball, grease the bowl, put the dough back into the bowl, cover with a tea towel and set it in a warm place to rise for about an hour.

During the spring/fall/winter, I preheat my oven to 200 degrees F, turn off the oven, then put the dough in the oven and leave the door cracked.

About an hour later, your dough should be nice and big.

Lovely.
Turn it out onto a lightly floured surface.

Roll the dough into a rectangular shape.

Use your handy-dandy bench scraper to cut the dough in half.

And roll the dough into two loaves, pinching the seam to seal and tucking under the edges. Please roll tightly, or you will get unsightly (and gigantic) air pockets in your loaves of bread.

Place your newly-formed loaves into two greased loaf pans, cover, and set them in a warm place to rise. This is when I preheat my oven to 350 F and then put the loaves on top of the stove, since my oven vents onto the stove top.

Another thing I do is put a small pan of water in the bottom of the oven to create steam. Makes for a crispier crust if you're into that kind of thing.
Half an hour later, your loaves should be well risen. Sorry for the yellow photo. I may have relapsed and stopped using my camera.

Bake at 350 for 45 minutes. When it's done the bread should sound hollow when thumped on the bottom.
As usual, one of my loaves is bigger than the other.

It looks like real, honest-to-goodness bread!

Now all you need to do is slice it up. Use a large serrated knife. It may take a little practice to get uniform slices.

Ain't it purty? My mom trained me to save bread bags, so I always have a supply on hand. Once the loaf is sliced, stand it vertically on one end and slide a bread bag down over it. Much easier than trying to wrestle an horizontal loaf into a bag. Trust me.
This is good for sandwiches, peanut butter toast, whatever. Keep it in the freezer if you don't plan to use it all in a day or two. I usually slice both loaves, freeze one and leave the other out for immediate use. It doesn't normally last much longer than a day. I think I made bread three times last week. I was not amused. But the family could be eating worse things, so I guess I really don't mind after all.
If you're feeling adventurous, substitute molasses for the honey and melted butter for the olive oil. Yum.
Heavenly Honey Wheat Bread
2 1/4 to 2 1/2 cups warm water (120 - 140 F)
1/4 cup honey (or molasses)
3 tsp active dry yeast
1/4 cup olive oil (or melted butter)
6 cups 100% whole wheat flour
8 tsp vital wheat gluten
1 tsp salt
Well, that's all for today. I have to go have some peanut butter toast now.
Enjoy!


looks delish...pass the preserves please!
ReplyDeleteHaha! I'm getting ready to make some peach jam...it will be a match made in heaven indeed!
ReplyDeleteI cannot believe how beautiful your bread is!! I have not tackled baking bread yet- but it is on my baking to do list!! If you can make me a sourdough loaf- I would be in heaven!!
ReplyDeleteThanks, Marci! Finding a good sourdough starter and learning how to use it is on my short list of things to do. Once I figure it out, I will hook you up ;-)
ReplyDeleteThis looks great. I keep meaning to make my own bread seeing my kids eat all. the. food. and I need to cut corners somewhere. This looks great, particularly with the honey! Thanks for linking up at #SustainableSundays
ReplyDelete